Key Factors That Influence Vinyl Adhesion to Wall Surfaces
When we plan environmental graphics, the wall condition sets the starting point. Adhesive vinyl needs a surface that supports clean contact. However, many walls look ready before we test them.
Paint type matters first. Low-VOC, washable, textured, or silicone-heavy paints can resist adhesive. In addition, fresh paint needs time to cure before our graphics go up. We usually look for a full cure period, not just a dry surface.
Texture also affects the final bond. Smooth walls give vinyl consistent contact across the graphic. Meanwhile, orange peel, stucco, brick, and heavy knockdown textures create gaps under the film. Those gaps can lead to lifting, especially near edges and corners.
Moisture creates another issue. Walls near restrooms, kitchens, exterior entries, and concrete areas may hold moisture. Therefore, we check for signs like bubbling paint, dark spots, or soft drywall. If moisture remains, the vinyl may fail even with proper cleaning.
Temperature plays a role as well. Cold surfaces make adhesive less responsive. On the other hand, very warm surfaces can make vinyl harder to position. We consider room conditions before we schedule installation, because stable conditions help our work stay consistent.
Dust, grease, and construction residue can also block adhesion. Even small particles can create raised spots. As a result, our prep focuses on removing anything that stands between the adhesive and the wall.
Essential Steps for Wall Surface Prep for Vinyl Installation
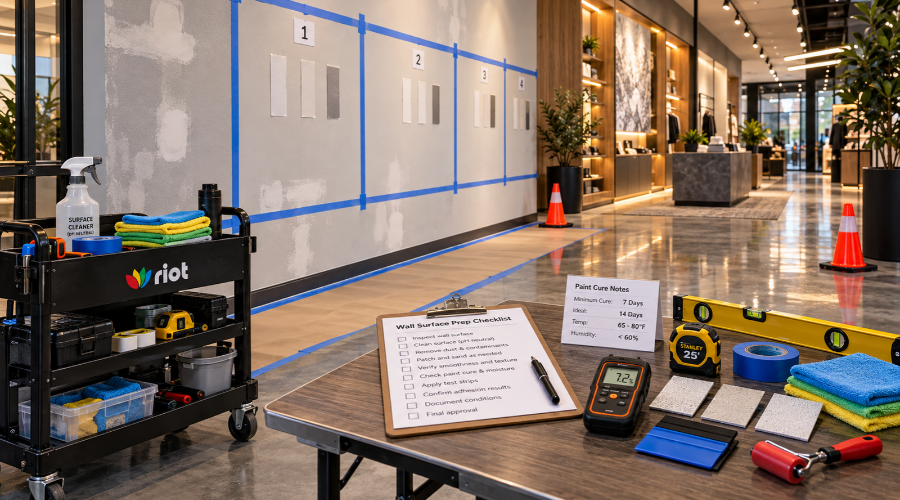
Our process starts with a close wall review. We look at paint, texture, damage, moisture, and general cleanliness. Then, we match the prep approach to the site and the graphic requirements.
Before cleaning, we confirm that the wall can accept graphics. This includes checking paint age and finish. We also note previous repairs, patch areas, and uneven surfaces. These details help us reduce surprises during installation.
- Review the wall finish, coating type, and texture before production or installation.
- Confirm that paint has cured according to the coating manufacturer’s guidance.
- Remove dust with a clean, dry microfiber cloth or suitable non-shedding material.
- Clean grease, oils, or residue with approved methods for the wall and vinyl system.
- Allow the surface to dry fully before applying any graphic material.
- Test adhesion when wall conditions, coatings, or timelines raise concerns.
After cleaning, we keep the surface protected from new dust and handling. For example, active construction can add debris back onto a wall quickly. So, we coordinate timing when other trades are still working nearby.
We also address surface flaws before placement begins. Small bumps, loose paint, and rough patches can show through vinyl. However, basic cleaning does not fix wall damage. When repairs are needed, we identify them early so the project schedule can adjust.
Finally, we verify placement zones before applying graphics. Measurement, alignment, and wall condition all connect. Because of that, our team treats preparation and layout as part of the same installation phase.
Common Mistakes to Avoid During Wall Surface Prep for Vinyl Installation
One common mistake is installing over paint that has not cured. Dry paint and cured paint are not the same. While the wall may feel dry, solvents or moisture can still affect the adhesive.
Another issue comes from using the wrong cleaners. Some soaps leave residue that looks invisible. Consequently, the vinyl may stick at first and release later. We avoid cleaners that add waxes, oils, or films to the wall.
The Impact of Thorough Surface Prep on Longevity and Visual Quality
At Riot, we know that meticulous wall surface prep for vinyl installation is essential for delivering high-quality environmental graphics. Every step we take, from cleaning and repairing to proper priming, directly influences how well vinyl adheres and how your finished space looks. When we invest effort into surface preparation, we help ensure the installed graphics remain flawless and resist premature peeling, bubbling, or warping. The result is a professional, polished appearance that stands the test of time, supporting your brand and elevating the entire environment.
Expert Resources and Reference Guides for Wall Prep Best Practices
Riot combines experience with ongoing education and access to reference materials from major vinyl manufacturers. We use resources, data sheets, and installation guidelines that outline precise steps and compatible products for wall surface prep for vinyl installation. By drawing on updated documentation and proven best practices, our team ensures a consistent approach that accounts for unique wall materials, textures, and paint types. If your project presents special challenges, we can reference specific guides or consult with material suppliers to confirm the right preparation method and product compatibility.
Your Next Steps to Achieve Flawless Vinyl Graphics Installation
As you consider implementing new environmental graphics, we encourage you to start the process with a site assessment. Strong collaboration between our installation team and your staff avoids surprises and promotes a seamless transformation. We’ll review your walls, recommend necessary preparation, and answer any questions about what comes next. When you’re ready, explore the possibilities for wall graphics through our portfolio, and let Riot guide you from wall surface prep for vinyl installation through to final unveiling. Together, we’ll create visuals that endure and help your space communicate its story.
FAQ
What are environmental graphics and how do they transform spaces?
Environmental graphics combine design, branding, and visual storytelling to enhance and define a space. When we install vinyl graphics thoughtfully, we help shape how people experience and interact with their environment, making it both functional and memorable.
Why is proper wall surface preparation so important for vinyl graphic installations?
Proper wall surface preparation ensures that our vinyl graphics adhere securely and look flawless for years. Without adequate prep, even the highest-quality vinyl can peel, bubble, or fail to stay in place, undermining the entire installation. Therefore, surface prep directly impacts both the longevity and appearance of your graphics.
What factors influence how well vinyl sticks to wall surfaces?
Several factors, including wall texture, paint type, cleanliness, and moisture levels, influence vinyl adhesion. We consider all these variables before any installation so that the finished product meets our high standards and holds up against environmental conditions over time.
How do we determine if a wall surface is suitable for vinyl graphics?
We inspect the wall for smoothness, cleanliness, and moisture. Additionally, we test for paint stability and debris. This helps us identify any areas requiring repair or further preparation, ultimately ensuring a successful vinyl graphic application every time.
What are the essential steps in preparing a wall for vinyl installation?
Our process includes cleaning the surface thoroughly, repairing imperfections, priming if necessary, and ensuring the wall is completely dry. Each step is crucial, as proper prep leads to better adhesion and a professional-looking final result.
Can we install vinyl graphics on freshly painted walls?
While it might seem safe, installing vinyl graphics on freshly painted walls can lead to adhesion problems. We recommend waiting at least 14-30 days after painting, allowing time for the paint to fully cure. This extra waiting period guarantees the best performance for our vinyl graphics.
Are there certain paint finishes or textures we should avoid for vinyl installation?
Yes, we suggest avoiding high-gloss and textured finishes, as these can prevent strong vinyl adhesion. Flat and matte paints typically work best, ensuring our graphics lay flat while maintaining their striking appearance over time.
What mistakes commonly occur during wall surface preparation?
Common mistakes include skipping the cleaning step, ignoring repairs, and installing vinyl on wet or unstable paint. By meticulously following our prep steps, we avoid these pitfalls and ensure a professional installation with lasting results.
How does thorough wall prep impact the longevity and visual quality of our vinyl graphics?
Excellent surface preparation creates a solid foundation, directly impacting adhesion strength and the overall look of our graphics. When we take the time to prepare properly, you end up with vinyl installations that withstand daily wear and stay stunning for years.
Where can I find additional resources or guidance for preparing for a vinyl wall graphic installation?
We offer reference guides and expert advice tailored to your project needs. Reach out to our team for comprehensive best practices and step-by-step instructions. By leveraging our expertise, you’ll ensure flawless results every time you undertake a vinyl graphics installation.