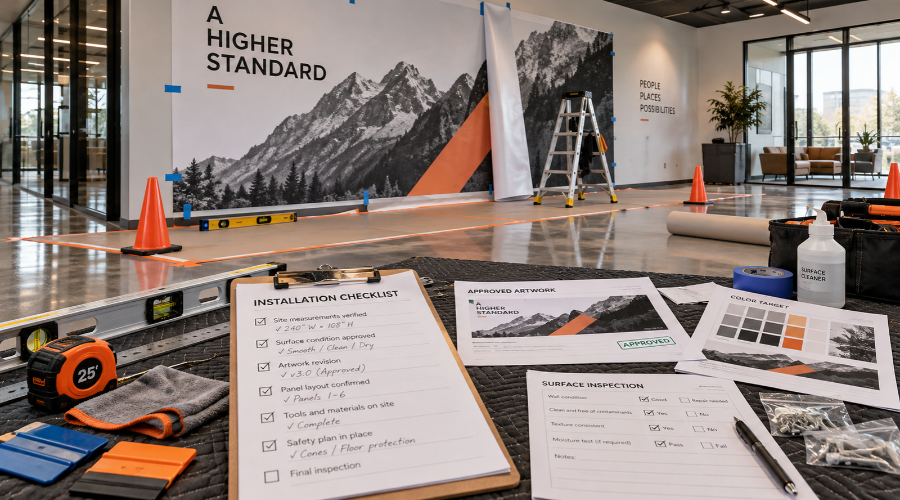
Essential Components of an Effective On-Site Installation Checklist for Graphics
At Riot, we start every site visit with a practical plan. Environmental graphics need more than strong design files. We also need accurate field information, clear access, and the right materials on hand. Because each wall, window, floor, or exterior surface behaves differently, our checklist focuses on conditions that affect fit, alignment, adhesion, and scheduling.
First, we confirm dimensions against approved artwork. Small gaps in measurements can lead to extra seams, awkward crops, or reprints. Next, we review surface type and finish. Paint age, texture, dust, moisture, and temperature can all change how graphics perform. Also, we look for obstacles such as outlets, vents, trim, security devices, sprinklers, and door hardware.
- Approved artwork, scale, color targets, and production notes
- Verified wall, glass, floor, or panel measurements
- Surface material, coating, texture, and condition
- Site access times, parking, elevators, badges, and loading areas
- Tools, lifts, ladders, hardware, and installation supplies
- Safety needs, traffic control, dust control, and workspace limits
- Client contacts, approval points, and final inspection steps
Then, we match the installation method to the location. A lobby mural may need low-disruption scheduling. A retail window may require careful cleaning and edge planning. Meanwhile, a branded corridor may need sequencing that keeps staff and visitors moving safely. These details help our crews work with fewer interruptions.
Step-by-Step Guide to Preparing Your Environment for Graphic Installations
Preparation starts before our team arrives. First, we ask for access to the area, including photos when possible. Photos help us see furniture, lighting, wall breaks, and traffic patterns. However, photos do not replace measurements. We still verify key details on-site when the project requires it.
Next, we ask that the space stays as clear as possible. Desks, chairs, merchandise, plants, and temporary signs can slow the work. If items cannot move, we plan around them. Also, we confirm whether we need after-hours access or phased installation. This matters for offices, schools, healthcare spaces, and active retail settings.
Before installation, surfaces should meet product requirements. Fresh paint usually needs cure time before vinyl application. Glass should not have residue from cleaners, tape, or silicone. Floors may need cleaning without wax. Therefore, we share preparation notes early, so our clients can plan with facilities teams.
Then, our crew lays out graphics and checks placement. We review sightlines, edges, and alignment before final application. When needed, we mark reference points with tape. We also protect nearby finishes and manage tools in a defined work area. As a result, the installation stays organized and safer for everyone nearby.
Common Pitfalls and How an On-Site Installation Checklist for Graphics Helps Avoid Them
One common issue involves unready surfaces. Paint may look dry but still release gases. Dust can hide in textured walls. In addition, cleaning products can leave films that weaken adhesion. Our checklist helps us identify these risks before graphics go up.
Another issue involves unclear approvals. A graphic may align with the file but not with a stakeholder’s expectation. So, we confirm placement, height, and orientation when the decision-maker needs review. This step prevents last-minute changes during application.
Maximizing ROI with a Thoughtful Graphics Installation Process
When it comes to creating impactful spaces, the real value of environmental graphics goes beyond their visual appeal. Implementation is what transforms innovative designs into experiences that engage and inspire. Ensuring every dollar invested yields measurable returns begins with diligent planning, and that’s where our commitment to a thorough installation process shows its worth. By incorporating a well-structured On-Site Installation Checklist for Graphics, we help our partners optimize budgets, minimize downtime, and protect the longevity of their installs. From project inception to unveiling, an intentional and methodical installation approach directly boosts long-term performance and brand recognition.
Professional Insights: Real-World Benefits of Using an On-Site Installation Checklist for Graphics
Our experience executing projects across diverse environments has proven that structured preparation makes a noticeable difference in outcomes. A comprehensive On-Site Installation Checklist for Graphics provides our teams, clients, and stakeholders with clear expectations and accountability at each phase. This clarity helps us quickly resolve unexpected issues on-site, maintain schedule integrity, and adapt to conditions unique to your space.
For instance, the checklist enables us to coordinate with facility operations, evaluate substrates and surfaces, confirm access requirements, and inventory all materials before arriving at your location. These steps significantly reduce the risk of errors and rework. Proper documentation and sign-offs throughout the process also support faster turnaround times for current and future projects. Whether it’s a corporate office, retail, or healthcare environment, our disciplined approach leads to repeatable, high-quality results – delivered efficiently and safely.
Taking the Next Steps: Expert Collaboration for Flawless Environmental Graphics
Success with experiential design and graphics is built on mutual trust and a shared commitment to quality. We see each project as a partnership, combining our practical experience with the needs of your team and site. Leveraging our environmental capability, we are ready to support your vision from strategy to installation, using the industry’s best practices.
Moving forward, the use of a detailed On-Site Installation Checklist for Graphics ensures smoother communication, streamlined workflows, and fewer surprises. Together, we can create spaces that leave lasting impressions. If you’re ready to elevate your project’s ROI and outcome, working together from initial planning will make the difference. Connect with us to explore how a thoughtful installation process can bring your environmental graphics concepts to life, on time and within scope.
FAQ
Why is an on-site installation checklist for graphics essential?
We believe a thorough on-site installation checklist ensures every detail is addressed, from site preparation to graphic placement. With a checklist, we consistently deliver visually impactful environments and minimize the risk of errors or missed steps.
What are the main benefits of using an installation checklist for environmental graphics?
By utilizing our checklist, we can streamline the installation process, ensure quality control, and address potential obstacles before they arise. As a result, our clients notice fewer delays and enhanced visual results in their spaces.
How do we prepare a space for graphic installation?
We start by conducting a thorough site evaluation, measuring the area, and checking surface conditions. Additionally, we coordinate with other on-site contractors and ensure all surfaces are clean and ready for graphic application, ensuring a seamless setup.
What key components are typically included in our on-site installation checklist?
Our checklist covers verification of graphic dimensions, inspection of installation surfaces, confirmation of graphic materials, safety precautions, and a step-by-step installation sequence. We verify every component to guarantee a smooth process.
What common pitfalls can our checklist help avoid?
Thanks to our comprehensive checklist, we avoid issues like incorrect graphic placement, missed approvals, environmental damage, or material inconsistencies. With each project, we learn and refine our process to further minimize risks.
Why is a step-by-step installation guide important for every project?
We use a detailed guide so our team and clients have full visibility into what to expect at every stage. This approach promotes accountability, fosters communication, and helps us manage timelines as efficiently as possible.
How does our installation process maximize ROI for clients?
Because we approach installations methodically, we deliver longer-lasting, better-looking graphics, reducing the need for repairs or reprints. Moreover, well-executed graphics significantly boost brand engagement and customer experience, increasing overall value.
What professional insights influence our installation checklist creation?
We continuously update our checklist based on real-world experiences, client feedback, and evolving industry standards. By learning from each project and staying current, we can ensure every future installation exceeds expectations.
Can we customize our checklist for unique spaces or unusual graphic materials?
Absolutely! We tailor our checklist to address the specific needs of each space, including materials, environmental factors, and unique challenges. Flexibility is essential in ensuring a perfect graphic fit, regardless of the environment.
How can clients take the next steps toward flawless environmental graphics?
Clients can reach out to our expert team to discuss project goals, space requirements, and timelines. As soon as we connect, we’ll guide you through the collaborative process, using our installation checklist to ensure exceptional results every time.